Friday, March 25, 2011

The Greatest Endeavor of Our Lives

wedding photos by Bret Baker

They took the first step towards creating a family of their own.  Yesterday, my dear friends, Matt and Megumi were married and sealed for time and all eternity. I was so proud of them and I can only imagine how pleased their parents must have been.  Her dad married them, and I was told that there was not a dry eye in the room.  Unfortunately we worked and were only able to make it to the reception.  I haven't been to a funner one in a long time.  They had a photo booth setup that took four separate photos, one set printed went into the photo-book being put together by Matt's sisters and one set had their names printed and the date for guests to keep as a souvenir of the evening.


wedding photos by Bret Baker

Meg's pretty bouquets and all the corsages and boutonnieres were made of silk flowers specially by her mother.

wedding photos by Bret Baker

Everything was so lovely and the food so good, I hated to leave as early as we did.  We had to leave early because we have to get up at 4:00 am so my husband can get to work at 5:00.  Afterward my husband and I looked through some of our own wedding photos and reminisced about our own "first day."   We talked about what we would do over, like having some one to help us make a wedding video, as well as talking about our favorite parts of that day.

I wish Matt and Megumi the best.  A toast to the great adventure ahead of them!

~Fraise

Wednesday, March 23, 2011

Japan Tribute: Sashiko

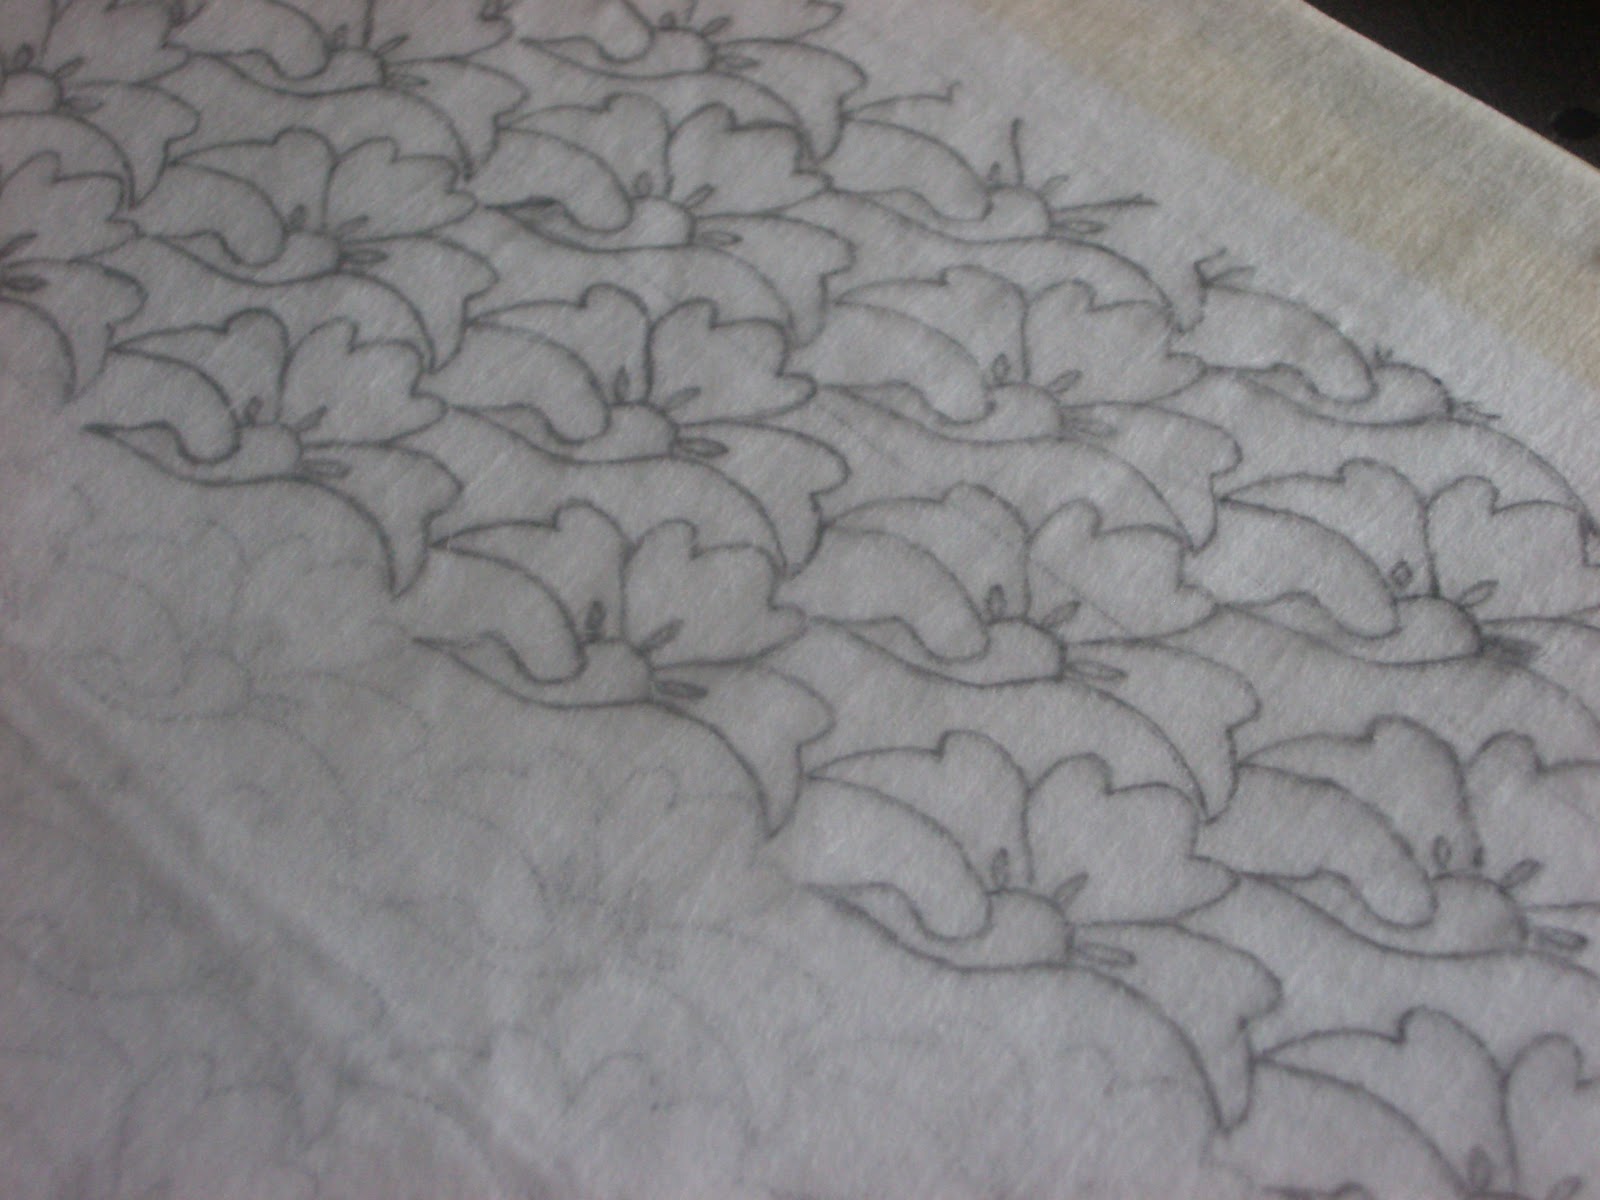
With all the natural disasters happening across the world, Japan has been on my mind lately.  I have two friends that are from there, and went through some pretty scary days with them while they were waiting to hear from their families.  In addition to donating, I thought I would do a post to celebrate one of the beautiful art forms originating in Japan as my tribute.  Sashiko or a type of Japanese quilting/embroidery uses traditional repeating motifs to create a unique pattern, originally used to quilt together layers of fabric and decorate clothing at the same time.  Most of the patterns pull from nature and the seasons such as: waves, flowers, rice paddies, cranes, etc.  Two years ago I checked an awesome book out from the library, by Mary S. Parker, called Sashiko: Easy and Elegant Designs for Decorative Machine Embroidery.  It give a history of the art form as well as at least 20 pages of pattern examples. (Even though it was for machine embroidery I found it very informative).  I have been intrigued ever since.


Sashiko is pretty easy in that it is done all with a running stitch, but can be complicated dependent on the complexity of the pattern.  You can purchase sashiko kits online at places like the Purl Bee, but if you don't have the luxury of ordering things like this online like me you can try my method.  Here is how I have adapted the techniques in the book to hand stitching. or in other words, here is Sashiko my way...


You will need:

a copy of a sashiko pattern (in my case I copied it from the book)
a computer with photoshop or an image manipulation software and scanner
a comfortable chair
a sheet of at least 12" X 12" NON-fusible interfacing that is thin enough to see a pattern through
a piece of cotton fabric preferably solid but if not a very low key pattern such as black on navy
     (cut to the size  you will want later for what ever project you use it for, bear in mind that it may shrink up to at least 1/4" smaller due to stitching)
embroidery floss in the color of your choice, typically some thing to contrast with the fabric
graphite pencil
light box, or window with really good light
16-18" ruller
masking tape
thread (for basting)
a good embroidery needle with a larger eye
thimble
optional: an embroidery hoop


1.  Dependent on the final size of embroidery piece you want you can use your photocopy if you want to practice or you may scan in and layer duplicates of the pattern until you attain the size you want.  I wanted it to be printed on 11"X14" so I took it to a copy center to print.


2. Tape your printed pattern onto you light box, or window.  (I just happened to be borrowing an overhead projector from my church library, so I used that).  Then center and tape your interfacing square over the pattern.


3.  Here is where you will need the chair.  Trace you pattern onto the interfacing with the graphite pencil.  You want to make sure you trace is as clean as possible so take your time.  I also traced the lines around the pattern so that my finished product would feel more clean.


4.  Once your pattern is traced, carefully take the tape off of your interfacing.  Position (in my case, center) your interfacing trace side up to the wrong side of your fabric, and bast in place. I usually do an "x" or cross through the pattern itself and then go around it.  If you are using an embroidery hoop go ahead and set that up.


5. Separate out 4 strands from your floss, and thread your needle.  Take a moment here and look at the pattern to see if you can find an easy pattern to go across in rows whether they are straight or diagonal, this really helps you get a rhythm and keep your work neat.  Note: I personally found it too hard to get even stitches with an embroidery hoop so I just don't use one.  Insert your needle and pickup one stitch on the interfacing side keeping you knot on top. You want to stitch all of you connecting stitches and knots on the interfacing side so that you end up with a perfectly stitched pattern on the right side of the fabric.

running stitch


6. Typically stitches are done from 2 - 5 at a time, this allows you to follow a line on the pattern more smoothly and helps to keep all you stitches pointing the same direction.  Remember it is just a running stitch so you can pick more than one up at a time pretty easily.  Don't worry if you have to do tight areas one stitch at a time. Continue on in the pattern.


7. Once you have finished, (and  don't forget to stitch that box around the outside that you traced) take out your basting stitches and press your embroidered fabric with the interfacing side on the board away form the iron.  This helps to smooth out and block the fabric so you can get a true measurement of the fabric block for what ever project you intend to use it for.


I hope you find this as fun as I have.  (I hope that my Japanese friend likes these pillows for wedding presents tomorrow.)  Anyway, happy Wednesday everyone!

~Fraise


Wednesday, March 16, 2011

Spring has Srung!


I just thought that I would briefly share with you what greeted me upon my arrival home from work.  I was so excited I called my mom.  I had never seen any crocus before in the few years we have lived with my father-in-law.  My mom says it was probably because they didn't get enough sun before since they were technically buried under a bush up until now.


My garden boxes are also showing a bit of "re-birth" that I had not expected.  Though I have a lot of work cut out for me I am over joyed at what I have been discovering!


I apologize for having disappeared for two weeks, but I got a cold, and took some time getting over it.  Amazingly enough my weight has remained stable at 185 lbs.  As of this last Monday I resumed my weekly work out routine, and hope that my renewed activity will restart my slow decent to my goal weight.

Hope that you are seeing miracles outside your door!

~Fraise

Sunday, February 27, 2011

Going Second


 Several weeks ago my husband and I went to a concert put on by the band Going Second.  As luck would have it my cousin, Scott Brimhall, is the bass player.  Going Second is a high energy alternative rock band popular among the tween and early teen age groups.  They put on a fun show, and they're music was awesome.


Getting ready to go to the show, I wished that I had some accessories to wear that would fit the vibe, but not make me look like a 30 year old that was trying to hard.  So since we plan to go to more of their shows in the future, I thought it would be fun to make myself some cuffs to wear.


I really like how they turned out!!  I ended up making three of them since I happened to run across the striped fabric and a red lace ribbon when I was looking for my black fabric.  All I need now is a band t-shirt, and I'm set.

Here's how I did it:

Measure your wrist, and add on about 1 1/2 to 2 inches for the overlap of the snap and the seam allowance.  For my width measurement I based it on the width of the Eveline lacy cuff I have in my Etsy store.  So I ended up with 9" X 2.5".


For my basic black fabric I used some old black microfiber pants I had, that way it's really soft on my wrist. Cut out two pieces, in the case of the stripey fabric I chose to cut my second piece out of the pant fabric.


Pin the pieces together and stitch around the whole thing leaving an opening at one end to turn it right side out later.


Clip the corners so that they are less bulky when you turn it.


Then turn the piece right side out and using your shears or a pencil push out your corners.


Press the seams open and then flatten the piece.


Blind stitch your opening closed with coordinating thread.


Then finally add your snaps, following the directions on the package.  I chose some large muted metal ones so I only used one for the closure.


You're done!  Don't they look cool?


Now I can't wait until the next concert.

~Fraise

Thursday, February 24, 2011

Weekly weigh-in and update


Ever have cleaning cause more severe harm than a couple stiff muscles and aches?  Well, a week from this last Monday, I somehow managed to do just that.  Thanks to a severely pulled back muscle I have not exercised once this week, or gotten to any of my cleaning.  My husband made the edict at the end of last week when he realized exactly how much pain I was living with.  However, I am pleased to say that last week after my fifth consecutive week of exercise I weighed 184.9 lbs!  I have gone back up some over the last few days, but have tried to regulate my eating in the mean time so that I can some how manage not to undo my hard work over the last 5 weeks.


You'll be pleased to know that while I have been taking it easy, I have also been trying to catch up on some of my hand projects and come up with some things to put into the Myrtilles Etsy store.    You'll have to go over and check them out.

Thanks for your support and for coming to visit.  Hope that you enjoy your end of February 2011.

~Fraise


Monday, February 21, 2011

Shower Season


You know you're in Utah when the season for baby and bridal showers starts in February or March.  I've been to a few over the last few weeks.  Just this Saturday I had a double header, a baby shower at noon and a bridal shower in the evening.  Kinda crazy day. Thankfully I had at least a week's notice and was able to get a hat, some headbands and flowers done.


 I even had someone at the shower ask if I had an Etsy shop.  I kick myself that I didn't tell her the name of it even though I currently have nothing in the shop.  I need to start taking myself a little more seriously, and take advantage of opportunities when they present themselves.  I hurt my back last Monday, so my husband forbade me from doing any cleaning this weekend, and thus I'll be able to do some catching up on some of my projects today!!

~ Fraise


Wednesday, February 16, 2011

Weekly Wednesday Weigh-in


Hello again.  Sorry for the Two month long vacation, but I thought it high time to get back to a regular blogging schedule.  I'm pleased to announce that I am in my fifth week of exercising consecutively! True it varies from week to week but my average is five days per week.  I am so happy!

It all started when I went to my yearly, and lo and behold my weight was tipping an all time high of 189 lbs (technically it was 191 but that was with clothes and shoes on).  Now for some this is an okay weight, but for my body, personally, it is quite heavy.  So I decided I needed to start really make good on my goal to slim down, and to make a concrete goal to achieve.  I decided that I wanted to get down to 135 lbs. by the end of the year.  I have worked hard to manage my portions and food intake and have continued riding our stationary bike as well as doing some aerobic and weight training exercises on the side.

As of last week my average weight for the week was 185.8!  I know it's slow, but progress is progress!


Anyway, hope you're Valentine's was delightful, I get to finish celebrating mine on Friday, CAN'T WAIT!

~Fraise

PS Sorry for the quality of the photos, they were taken with my phone.